Construction Class - Homa April 26, 2016 06:00 18 Comments
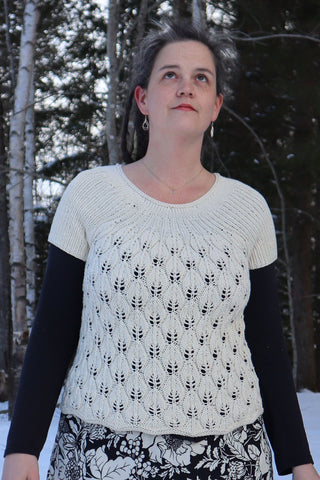
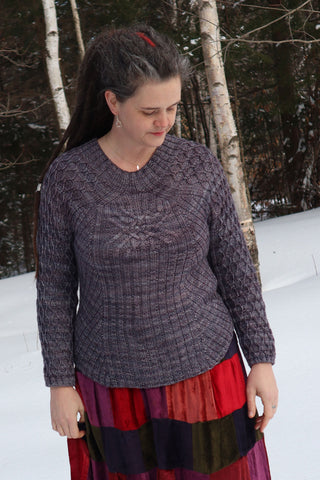
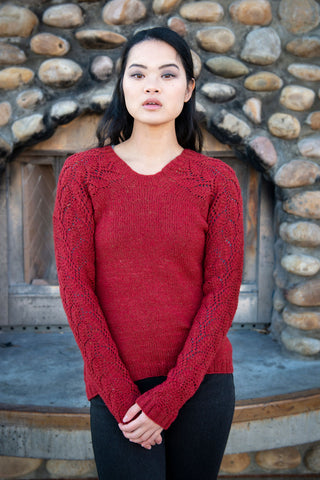
 One of the things I really love about knitting is the experience of watching a piece come together out of nothing. Starting with a simple cast-on somewhere in the sweater, then seeing it grow and form into something I can wear is fascinating to me. However, at some point, I got bored with knitting sweaters using the same-old types of construction—back, front, sleeves, sew-them-up… or even seamless yokes and raglans, bottom-up or top-down. So, in comes Homa—knit using Berroco's Remix yarn. It's a top-down pullover, but the construction is entirely unique, which I think makes it a whole lot of fun to knit.
Here is how it's made:
The upper body begins with a regular cast-on at the center of the left front. The left front neck is increased, then the left front stitches are placed onto a stitch holder. The left back begins with a provisional cast-on. A few rows are worked even, then the back neck is increased.

There are some stitches cast on for the top of the shoulder. The back and front stitches are joined and worked together, back and forth in rows with some decreases to shape the top of the shoulder.

When the shoulder shaping is completed the upper body measures half of your body's measurement across your shoulders, from the cast-on stitches to the needle. Now things get a little more interesting.
At this point, your body starts to curve over your shoulder and at your underarm. For a comfortable and flattering fit Homa has shaping for your underarm and shoulder, to match the shape of your body.
The armhole shaping is worked next, to lengthen the selvedge edges, so the measurement around your bust will fit, but without adding any more length at the top of your shoulder. To do this, a few simple short-rows are worked at the front selvedge edge, and then at the back selvedge edge.

Then the sleeve cap is knit to lengthen the center of the shoulder without adding length to the selvedge edges. This is done with some more short-rows.

Once the cap shaping is completed, a few stitches are cast on for the underarm, and the sleeve is slipped onto double-pointed needles and worked in the round to the cuff.
The right back stitches are picked up from the provisional cast-on on the left back, some neck increases are worked and the stitches are held while the right front is knit. Then the shoulder armhole, cap and sleeve are all worked in the same manner as for the left side of the upper body.

At this point it's fun to try on your sweater, and see how the shoulders fit before continuing with the lower body.
The lower body stitches are picked up evenly around the lower edge of the upper body, and knit in the lace pattern from the top-down, making it easy to adjust the length of the body to match your body.
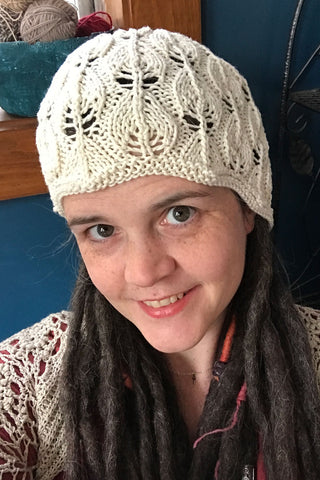
There are some neckband stitches that are picked up and bound off, then that's it! You're sweater is done! If you have some yarn left over—like I did—knit up a matching beret, using the Rasa pattern.
Both the Homa and Rasa patterns include written and charted lace pattern instructions. Homa has thorough, in-depth instructions for all steps, including the short-rows, and a detailed schematic.
I suggest using Berroco's Remix yarn for these projects for so many reasons: It's super soft to knit with, comfy-cozy to wear, and it's easy on your wallet! Plus it's made from recycled materials!
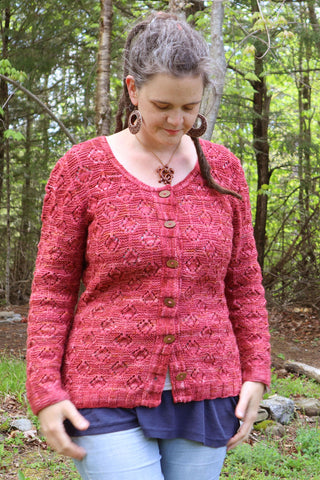
 Also, check out the Grace Cardigan, from my first book—Finish-Free Knits. It's knit using the same construction technique as Homa!


 Nothing will be posted on your behalf.


Comments
Rosalba Bassora on May 6, 2016 18:31
As soon as I saw it I knew I wanted to make it. I never made a sweater before but these instructions were helpful. Thanks for this chance. I’m still a bit timid to make it.
Nita on May 5, 2016 15:47
Thank you about the tip for my Grace cardigan. I can’t wait to get back to working on it!
Becky on April 29, 2016 08:33
Very interesting construction and pretty top!
janet on April 28, 2016 19:02
What a lovely sweater, and fascinating construction. I how you’ve tailored the fit of the neckline.
Rachel on April 28, 2016 08:42
Would love to knit this for summer. Love the top, and the construction would make it a fun knit.
Carol on April 28, 2016 01:00
Knits that don’t require seaming are always a good thing!
Carmen N on April 27, 2016 22:45
Quite the unique construction but it results in a beautiful pattern!
Katelyn on April 27, 2016 08:15
I thought that that sweater looked really pretty in the pictures. When you explained how it was made it really made it interesting!!! I would love to try out This pattern, thanks for the chance to win.
Lis on April 27, 2016 08:14
I love your book “Finish Free Knits” ? I would love to knit this top and add it to my wardrobe!
Sandee on April 27, 2016 05:09
Beautiful sweater would love to give it a try.
SherryG. on April 27, 2016 00:27
Gorgeous. Love the style and texture
Vivian on April 26, 2016 23:24
Looks like a very fun knit. I’d love to try this clever construction!
Kerry (beluke on Rav) on April 26, 2016 22:34
Like you, I like to try new methods of construction and this one intrigues me as I don’t think I’ve seen another like it.
Sorry, gotta run – I’m off to check out your book including the Grade Cardigan using the same construction method!
Eve on April 26, 2016 22:19
Great technique. Top downs are so relaxing. No sewing.
Connie K. on April 26, 2016 20:22
Beautiful pattern! I’d love the chance to make this.
Natari on April 26, 2016 14:23
Looks just beautiful!
Anne Marie on April 26, 2016 12:39
I’d love to try this pattern. The neckline is beautiful.
Heli on April 26, 2016 12:25
Fabulous construction, would love yo try it!