Knit Design Tips—9 Steps to Perfect Design Submissions August 12, 2015 09:30 5 Comments
You're creative, and you have an idea for a knit or crochet pattern that you would love to spread around the crafting community. But how do you do it?
From my own 10 years of experience publishing patterns with publishers and self-publishing, I recommend publishing your first (few) pattern(s) with a publisher before tackling self publishing. It will help you get your feet wet, the editors are often very helpful and it will get your name out there.
Here are the steps I follow whenever I have a design idea I want to submit to a publisher. Please leave a comment at the end, if you've found this helpful!
Step 1: Follow @KristenTenDyke on Twitter
I'm serious. This is the most important step. I tweet about every design submission I come across and use the hashtag #DesignSubmissionCalls. This is a great way to hear about up-to-date design submission calls and to give yourself enough time to get your submission put together before the deadline.
Step 2: Be Inspired
Many publishers have a theme in mind for their publications, and they tell you all about them in their call for designs. Some even create something called a "mood board" with images that can be used as inspiration for your designs.
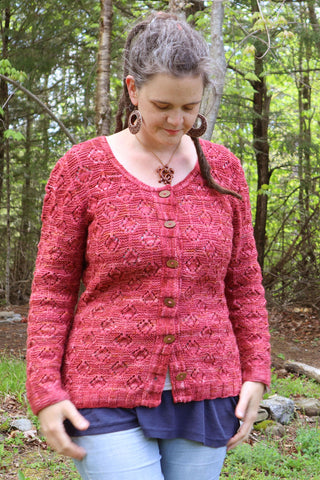
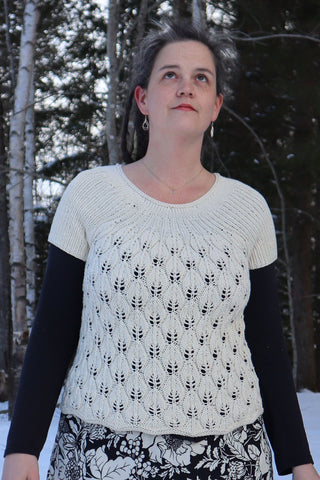
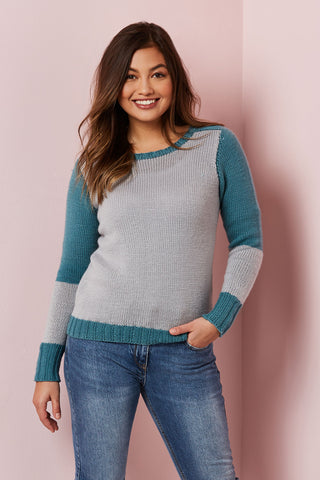
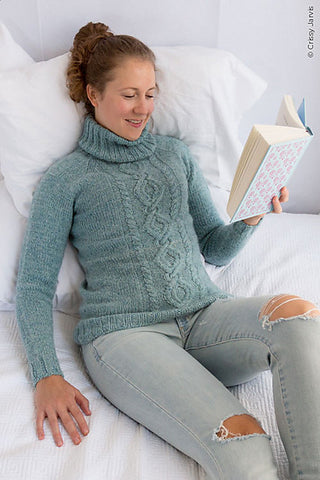
 My Cherrywood Pullover sweater, published in Twist Collective's Fall 2015 issue, was designed to fit into their "Against the grain" theme. The mood board showed photos of wood grain. My concept was that the cable in the Cherrywood Pullover is knit sideways across the body, with the upper and lower body portions picked up from that cable and knit up and down. The cable goes "against the grain", and the garter stitch is reminiscent of the rings of a tree.
My suggestion for how to design something that fits into a publishers theme is to not try too hard. Don't think about it too much. Read over what they are looking for and let it percolate. Keep it in the back of your mind as you go about the rest of your life. If it's right for you, something will come. Then move on to steps 3 and 4.
Step 3: Sketch
Steps 3 and 4 could be done in either order. Draw up a sketch of your design idea. It doesn't need to be perfect. The publisher is simply looking for something that will convey your idea.
 I've found that drawing my ideas on a person has been more successful than drawing the item alone. My technique is to print out the file shown to the left, which has 2 different images, printed very lightly. I use that as the base for my sketch. I draw over it in pencil, then when I have a rough shape outlined I'll fill in the details. When I say details, I don't mean that I spend hours drawing out intricate stitch patterns, I mean that I'll draw 2 diagonal lines to represent a cable, and I'll cross-hatch any sections of the pattern that use lace, or any all-over stitch pattern. It gets the point across. Then I go over the whole thing in ink, and erase the pencil. Make sure you choose a pen or fine-tip marker that won't smudge when you erase the pencil.
Step 4: Swatch
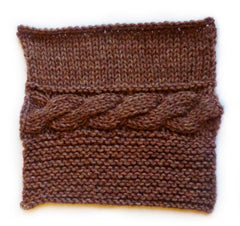 Find what you consider to be the perfect yarn for your design—consider the weight, drape, fiber content, color, etc… But, don't get too attached to it. Some publishers will need to adjust yarn and/or color choices so all the designs in their story feel right together. Use your selected yarn and a needle size that you would use to knit the finished project, and knit a swatch that represents your design. Are there multiple stitch patterns? Include them all in your swatch, showing how they relate to one another. Is there an interesting construction that you could show minimized? Show it in your swatch.
Once your swatch is finished, treat it like you would a finished project. Weave in the ends and block it.
Step 5: Photograph your sketch and swatch
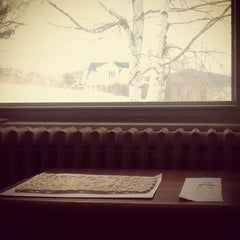 They are the bulk of your design submission and you want them to be represented as professionally as possible. I always photograph my sketches and swatches early in the morning, while the sunlight is still diffused. I have a table right in front of a south-west facing window where the light comes in at this time of day. I keep the lights in the room off, and rely on the diffused sunlight to illuminate my photographs. I lay a blank white piece of paper on the table, then place my swatch onto the paper and take a few photos of it from different angles. I'm careful to avoid letting my shadow cover the swatch when choosing where I stand. Then I do the same thing with my sketch.
I upload the photos onto my computer and use photoshop to adjust the brightness, contrast and sometimes color balance on the swatch photos until they look how I want them. There are many free photo-editing programs available. You can use whichever one you're most comfortable with.
- For the sketch photo, I'll turn it into a greyscale image, then increase the contrast all the way, and play with the brightness until I can't see the croquis drawing or any erased pencil lines and only the dark ink lines are visible.
- For the swatch, I generally leave the contrast alone, but will adjust the brightness slightly, and if the color balance doesn't look like the swatch, I'll adjust so they match. Then I add a new layer, and with a diffused-edge brush I'll draw around the edge of the swatch, where the white paper is, so it's a bright white, and so it will appear as though there is no background behind my swatch.
Step 6: Assemble Your Submission
 My design submissions have a few purposes. The main purpose is to share my idea with a publisher. The secondary purpose is that it is where I keep most of my notes about the design. Of course the sketch and swatch are included, and I also include the specific yarn, color, needle size and gauge that I used for my swatch. I began including this information on my design submissions after many submissions where I had to reswatch because I didn't know what needle size I used. Doing this saves me time. I also include a bullet list about the construction and what's awesome about this design. A bullet list is easy for the publisher to read through, without being too wordy. It gets the point across. Short and sweet. Plus, it helps me to remember what I envisioned when I go to write the pattern after the design has been accepted. I've recently started including my bio and a head-shot in my submissions also. I can't say if that's necessary or not, but I feel like it's nice to let the publisher know who I am, and what I've done. Maybe it gives them a little bit of an idea of what they can expect from me.
I use Adobe InDesign to layout my design submissions, but any layout program will work—even Microsoft Word.
Step 7: Submit!
Double check the design submission call to be sure you're including everything that the publisher requests. Some publishers require things like a requested designer fee, or why you think your design will fit into their theme. Just take another look to be sure you're not overlooking anything. Your design submission is a representation of your attention to detail, and will show the publisher how well you follow their requirements. Then, e-mail (or snail-mail if that's what the publisher requires) your submission away.
Step 8: Be Patient
Waiting is the hardest part. Some publishers take up to 3 months to decide which designs they will use in their publication, and the majority of them will inform you if your design was not accepted, so there is no need to contact them about it. My personal rule is that if I don't hear back one way or another within 6 months, I'll submit it elsewhere, assuming the first submission was not accepted.
Step 9: Celebrate
Whether you receive an acceptance or rejection letter for your design, it's reason to celebrate. If your design was accepted—you're excited and eager to get started—it's obvious why you would celebrate. But, even when your design is not accepted, don't be discouraged. You have a design submission prepared and available to submit elsewhere. When you see that next #DesignSubmissionCalls tweet, you've got a submission ready to go! From my experience, the more I love a design, and the more excited I feel about it, the more likely it will be accepted. So, keep your spirits high. Sometimes a design needs to be submit to a few different places before it finds the right publisher.
Leave a Comment:
Was this post helpful? I'd love to hear your thoughts in the comments section below.
Tell me about your reasons to celebrate submitting designs!


 Nothing will be posted on your behalf.

Comments
Marie on March 26, 2019 10:18
Thank you for this post. That is exactly what I needed today.
Now to go work on that submission in time for the deadline.
Kat Leffler on March 26, 2019 10:19
Thank you, thank you, thank you.
I’ve built a few submissions, all of which were rejected – from 1 publisher, but kept thinking that I could use them elsewhere as well.
You’ve given me a few things to think about & new hope for my patterns. I know they are still good but may just need to find their proper home.
And I’ll be taking a close look at my pages to see what I can improve!
Thanks again,
Kat
Lilia Vanini on July 10, 2017 21:45
As I´m looking for my first submittion I found your article, I read it and I love it, in a simply and direct way you just explained what I have to do. I started with my patterns two years ago but I never submited to publishers, now I´m so excited and ready to work on this!
Thank you so much and I love your website!!!
Lilia/Liliacraftparty
Brooke on November 23, 2016 22:19
Hi Kristen,
I did a quick scan and you’ve done an excellent job with this article. I’m impressed!
I used to design for magazines like McCall’s Needlework & Crafts, the Woman’s Day craft series, Leisure Arts leaflets, etc. That was back in the days before the internet — when magazines, books, and leaflets were the only place to buy patterns. Now it’s time for me to get acquainted with the online world of knitting.
Not only is this article well done, your Cherrywood pullover is a stunner — simple and elegant.
I look forward to coming back to do a long perusal of your website. Brooke
Novella Bobo on October 23, 2016 20:06
Hi Kristen,
I have a question about this post: What if there are pics of my 1st designs all over fb? Sincerely, Novella